Sunday, November 28, 2010

Eggs don't come from a grocery store ;)

Just one short year ago , I thought all eggs were created equal.  I bought whichever one was on sale,  without a thought.  Besides there really wasnt much of an option to choose from ,  brown or white , large or extra large, and the most recent addition Eggs with omega 3s...  Of which I'd heard some very interesting stories about... ranging from genetically modifying the chick with fish genes.. to the more realistic story of adding omega 3's to the feed , thru fish oils and possible modified grains.  I must admit , I did try a couple packages of these, then went back to the standard issue eggs deciding it was not worth paying twice as mich..  Then about nine months ago, we started seeing Free Run eggs in the markets ...  not free range, but atleast the little chickens would have some access to outside.  I immediately switched over to these, the were a little more money, but I thought it was worth it as the egg did taste a little better , and had a nicer yolk.  
Then I met my new friends the Svetecs, at the farmers market , and for the first time ever .. I had access to free range eggs, real local farm fresh ones!!  Not mass marketed , only sold at the the farmers market and their farm.   Once again they were more than the standard issue eggs,  but surprisingly cheaper than the omega 3 ones though.   I grabbed a carton , and left thinking of bacon and eggs, and fritattas. That was about five months ago now,  and Ive never looked back.   Free Range only in my household now!  
So here I am five months later, working on the farm!! Mostly helping with building a huge greenhouse, but Ive also helped with garlic planting. Last week, I asked if I could help with the daily chores :  feeding and watering the chickens, turkeys and animals in the little petting zoo area.  Also of course the egg collection duty :)  I had so much fun,  I thought Id share my experience with everyone :)  Enough words!! Enjoy the pictures.
Its so neat how they all come to greet me :)


Interesting fact I learned, chickens love warm water when it cold out, and it helps with egg production .


I'm guessing I should come back in a few minutes :) lol

For some reason I assumed they would try and protect the eggs...  I was wrong. 

Little  kids hide your eyes!!  Caught in the act

I was amazed that so many eggs would be in one nesting box.  Washing is required.   

Eggs everywhere !!  :)

After the collection, I opened the door and let them have free range. 

Happy Chickens makes for great tasting eggs. 

and these birds sure are happy! 

Just cruising around pecking at anything in sight!

Free Range Goodness! 

So there you have a quick snap shot of my first day collecting eggs, I hope you have enjoyed it.  I urge you to find some free range eggs and give them a try, I'm positive you will be extremely pleased.  The colour, texture and taste is vastly superior to standard issue eggs! 

Happy Cooking ! :)
Enjoy those eggs
Rich

Friday, November 26, 2010

Meat Lovers Sirloin & Sausage Pizza - Pizza from scratch 3 of 3

Pizza!!  Such a wonderful, versatile food!!
If you have been following along , you can skip the next two pictures.   If your just finding this link or page,  this is part 3 of 3 , this is a quick photo recipe of how to make pizza from scratch. 


Red Pepper and Garlic Pizza Sauce

Click here for a photo how to : http://richfletchersgoodfoodrevolution.blogspot.com/2010/11/my-favourite-sauce-making-pizza-from.html

12 Grain Whole Wheat Pizza Crust ( Rolling pin optional :)
Click here for a photo how to : http://richfletchersgoodfoodrevolution.blogspot.com/2010/11/crisp-12-grain-pizza-crust-making-pizza.html

Assemble your ingredients.
 For the pizza toppings I used , this made enough meat for two pizzas, so if you only making one , or don't want extra .. divide the meat quantity by two. 
  • 1 pound ground sirloin
  • 1 Mexican sausage ( approx 1/4 lb )
  • 1 red bell pepper
  • 1 red chili pepper
  • 5 or 6 mushrooms ( Use your favourite, white ones were on sale :)
  • 1/2 Anaheim pepper
  • 1/2 poblano pepper
  • 1 medium red onion
  • 2 cloves of garlic
  • 3 roasted red peppers
  • 1 cup of your favourite cheese - I used Mozzarella and 6 yr old cheddar

Slice everything, except the red chili and garlic, these should be minced. 

I start the pan with a  a small hand full of onion, and a pinch of the garlic,  then add the meat.  Breaking it up with a spatula.  Cook on medium heat until lightly browned.

Save a small portion of the roasted red peppers and red onion for later.


Add all your veggies to the pan, I like to add a little S&P , and L&P at this point. Maybe a sprinkle of chili powder if your in the mood for it.
 Now is a good time to get the oven warming.  I cook slow and low, so 360F it is,  don't forget to preheat your pizza stone if using one.  Your pizza will cook more evenly. 

I like to sizzle this until the peppers are half way cooked, 5 minutes maybe . 

While the pan is on , you can grate your cheese.  I made the mistake of letting the Mozzarella  come to room temperature... made for difficult grating. 


Spread the pizza sauce over the crust, add a sprinkle of cheese , and move to the pizza stone.

Next  It's time for the good stuff,  Today I choose to pile it high!!  Try to spread it out evenly/

Once your happy with the meat and veggies, sprinkle the remaining cheese,  red onion and the roasted peppers over the pizza.  This was a meat lovers, but if you wanted to add some more cheese, it could easily become a cheesy meat lovers:)
 And into the middle of  the hot oven , for about 15 minutes. 

I like to let my pizzas sit for a few minutes before slicing. Seems to help when cutting a stacked pizza.  Leaving it on the stone will ensure its still nice and hot.

Nothing left to do now but , grab a slice and enjoy!!
Well, I hope you've found my 3 parts series on making a pizza from scratch helpful.I'm sure Ive missed a few steps in there somewhere. I was having a hard time putting thoughts to keyboard this week. So please fire away if you have any questions or comments. 
My favourite thing about pizza , is you have SO many options and styles to choose from... and almost any combination of goodies will work.  Just remember to have fun with it !  Enjoy!

Happy Cooking
Rich


Baking

Tuesday, November 23, 2010

Crisp 12 Grain Pizza Crust - Making Pizza 2 of 3

I had a hard time deciding which step came first , the sauce or the crust, as when I'm making everything from scratch I usually start both at about the time.  Both steps require about an hour to produce, but no fear, that is almost all resting/simmer time.  If you are pressed for time, both can be prepared ahead of time.

Just a quick comment before we get started on this easy to make crust .  I've recently changed how I upload my photos to the web album, then onto here.  It has an option for a large file size, which limits it to 1600pixels,  instead of the 4mb original shot which was around double that.  So please , if you see a drop in picture quality let me know.  Either by posting a comment or sending me an email, the link to which is on the right hand column , near the bottom.  Thank You. 

So , now on to bread making .   I should note I prefer a crispy crust, so that is what this will produce.  I'm working on a couple of other styles, and will be posting them sometime in the, hopefully, near future:)  You will need
  • A large mixing bowl, and wooden spatula 
  • 1 cup 12 grain flour - no additives, just the whole grains ( some ground , some whole )
  • 2 cups whole wheat flour
  • 1/2 cup spelt flour - If you don't have any just add some of either above
  • 3 1/2 tsp of yeast
  • Olive Oil, Salt & Pepper,   
  • Basil, and a clove or two of garlic ( You can add almost anything you like here ) 
  • 1 1/2 cups warm water
  • Pizza Stone or Baking Sheet
Please keep in mind, all the above ingredients are quite flexible ..  I rarely use any thing other than a mug a Teaspoon for measuring, and never follow my original recipe ( Thanks Jean :) anymore. 
 

I recommend assembling everything before you begin, photos are optional :))

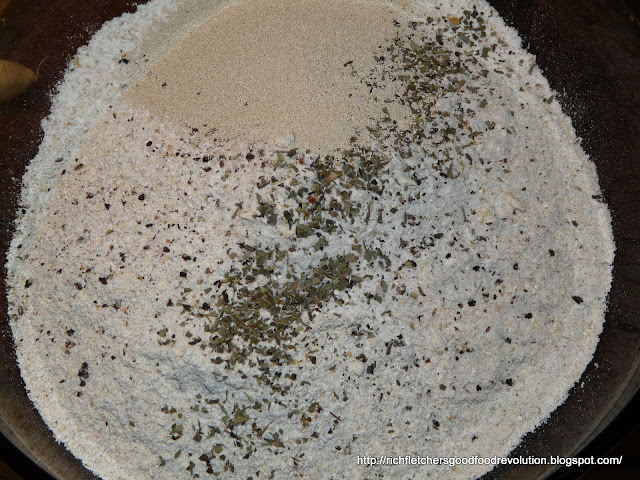
Add all your dry ingredients, and give it a good stir to blend everything.

Make a well in the middle of your flour. Then add a couple of glugs of olive oil , and a cup of water to start

I do all the mixing in the bowl now. Just with a spatula, just keep stirring it around ,  adding a bit of oil if its sticking too much.  Keep going until its a consistently thick.  Usually 5 - 10 minutes. Then place a clean tea towel over the bowl and leave it to rest.
 You can do things,  a couple of different ways here. Usually I let it rest for 30 minutes , twice knocking it back down ( remixing ) with a spatula.  
 I forgot about it for an hour,  and it had risen right to the top of the bowl!!
 If your going to be cooking this right away, now would be a good time to preheat your oven, and pizza stone.  360F is where I cook mine,   I go for the slow and lower method ( partially due to my oven not holding high temps well ) 


After it has risen,  I give it one last mix, more oil maybe required,  and divided the dough ball in two ,  saving half for the next day.  This should make 2 nice 12" pizzas...  I say should , as well...  see for you self :)

The dough will be very elastic, and a little unwieldy..  I have two methods,  this one is way more fun :)  I simply stretch the dough as far as I can in my hands, and then flop it onto the stone,  The spread it out by hand , until Ive reach my desired thickness.  

Or as in this one ( same batch , next day )  I flopped it onto the hot stone , and rolled it out .. nice and even. 

Once your crust is cooked , almost all the way ( approx 20 minutes depending on the thickness, I like to check at the 10 & 15 minute marks ) Remove it from the oven.  
 If your saving it for another day , place it on a rack to cool for about twenty minutes. I have a large freezer bag that I keep handy for flat breads, and such.  Other wise : 


Add your sauce and toppings...    and away you go.
I realize a lot of you are thinking.. this is not how to make pizza :)  Well your right,  but this is my way of making pizza , and I love it.  It allows a lot of forgiveness, its super easy , and can be all be prepared ahead of time, and even frozen if that's the way you like to do things.  :)  Please check back soon , for part 3. Enjoy!

Happy Cooking :)
Rich

Baking on FoodistaBaking

Sunday, November 21, 2010

Rich's Wild Hummus Pizza Sauce! - Pizza from scratch 1 of 3

The hardest thing about making this pizza sauce was coming up with a title for it! :) I think I spent more time staring at the screen trying to come up with something that will do it justice, than I did prepping the sauce. So I decided to keep it simple.  As it is my favourite , so far anyway ;)
Ive been making Pizza at home for a long time,  just not completely from scratch. I used to buy all these fresh, healthy and wonderful toppings and then pile them on top of a pre-made crust and use store bought sauce ... which between the two usually cost as much as the toppings ??  Tasted pretty good. Certainly better than frozen , or most take outs.  Still, it just never made sense to me to spend that much for sauce and bread?? So a couple of years ago I started making my own sauces, at first using canned tomatoes and paste as a base...  and finally this year with fresh tomatoes from my garden. Now that it is November here in Canada , local hot house ones will have to do :) 

This should make enough for three 12" pizza crusts, You will need:
  • 3 of your favourite tomatoes, I used Ontario hot house ones for this one.
  • 3 tablespoons secret ingredient ( revealed below :)
  • 3 Mushrooms, usually I would use cremini mushrooms, but had white ones on hand.   
  • 1/2 of a medium red onion
  • 1 clove of garlic
  • A few shakes of Italian Herb ( or basil, oregano, rosemary )
  • 2 Roasted Red Peppers ( leftover from making hummus :) 


Roughly chop the tomatoes, mushrooms, and onion .  Mince the garlic. 

Warm a small saucepan with some splash of sunflower oil, add most of the garlic and onion , saving a pinch of each..  sizzle for a couple of minutes.

Add the chopped mushrooms , and continue for a couple more minutes. 

Remove from the pan, reserve this for a little later. 

In the same saucepan,  drop in the tomatoes, red pepper, and the raw garlic & onion saved from above.  A few cracks of fresh black pepper , a pinch or two of sea salt, Italian seasoning and a couple of glugs of olive oil. Simmer on a medium heat, stirring every ten minutes or so. Set a timer for 45 minutes, it should get you close. 


After about 45 minutes,  it should looks something like this..  not quite solid,  but getting a thicker.  If its too watery , you can turn up the heat , and reduce it alot quicker while stirring more frequently.  I'm usually prepping the rest of the pizza toppings , or baking the crust while this is simmering so I go for the low and slow method and will just leave it simmering for another 20 minutes if needed. 

Add in the special ingredient :) My Roasted Red Pepper & Garlic Hummus ( See link below for a how to ) the reserved onions and mushrooms.
 http://richfletchersgoodfoodrevolution.blogspot.com/2010/11/roasted-red-pepper-garlic-hummus.html

Just give it a quick stir and a few minutes simmering to help blend the flavours.

If you have one, use your stick blender.. or transfer to a food pro or blender. 
I MUST add at this point,  blending in a small saucepan does NOT work !! lol

I recommend transferring to a medium/large heat resistant measuring cup for the blending process :) 
   
And that is it , you have an amazing ,healthy and tasty pizza sauce .. all that is left is to spread it on your pizza crust or flat bread :) 
I hope you liked my new favourite pizza sauce. Please check back soon, or sign up for the email notifications, for part two .. how to make your own 12 grain pizza dough : ) I was hoping someone could help me out with a better title ? Any suggestions ??  

Happy Cooking!
Rich 
    

Pizza Sauce on FoodistaPizza Sauce